How to Record a Podcast on iPhone in 7 Steps (Guide + Tips)
Step into the world of podcasting with just your iPhone and tell your stories anytime, anywhere!

Overview
According to Backlinko, there are around 464.7 million podcast listeners worldwide. This booming popularity makes podcasting a rewarding endeavor for content creators, marketers, and storytellers alike.
In an era where everyone has a story to tell, your iPhone could be your ticket to the podcasting world. Now you might wonder, ‘How could I record a podcast using my iPhone?’. Well, don’t worry; we’ll guide you through the whole procedure.
Here's a sneak peek into what we'll cover:
- Step-by-step instructions for recording a podcast on your iPhone.
- Proven tips and tricks to enhance your podcast recording experience.
- The best podcast apps and software for top-notch podcast production.
- Essential pre-recording setup and preparation.
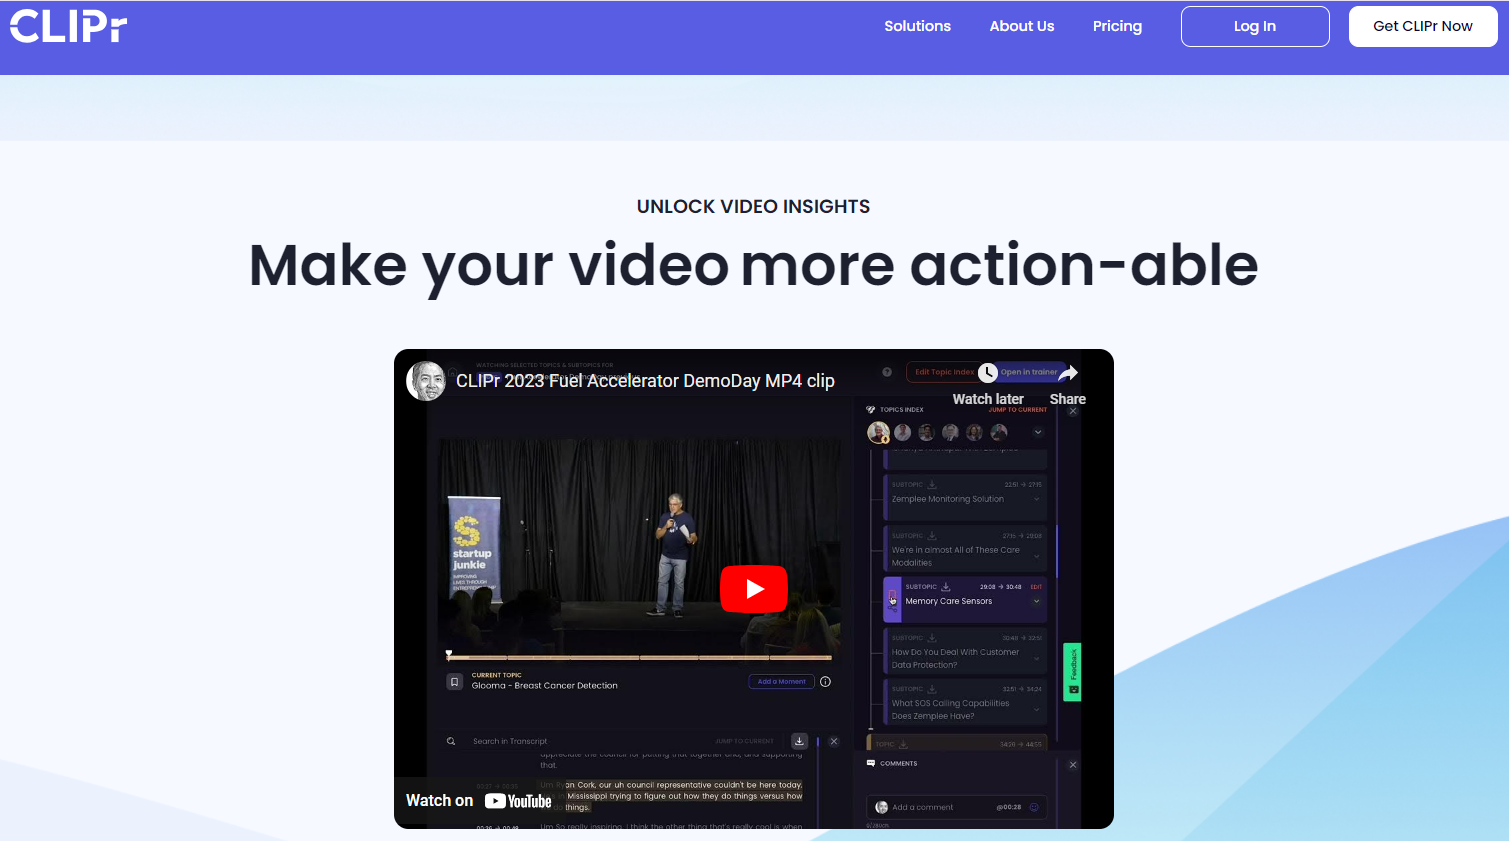
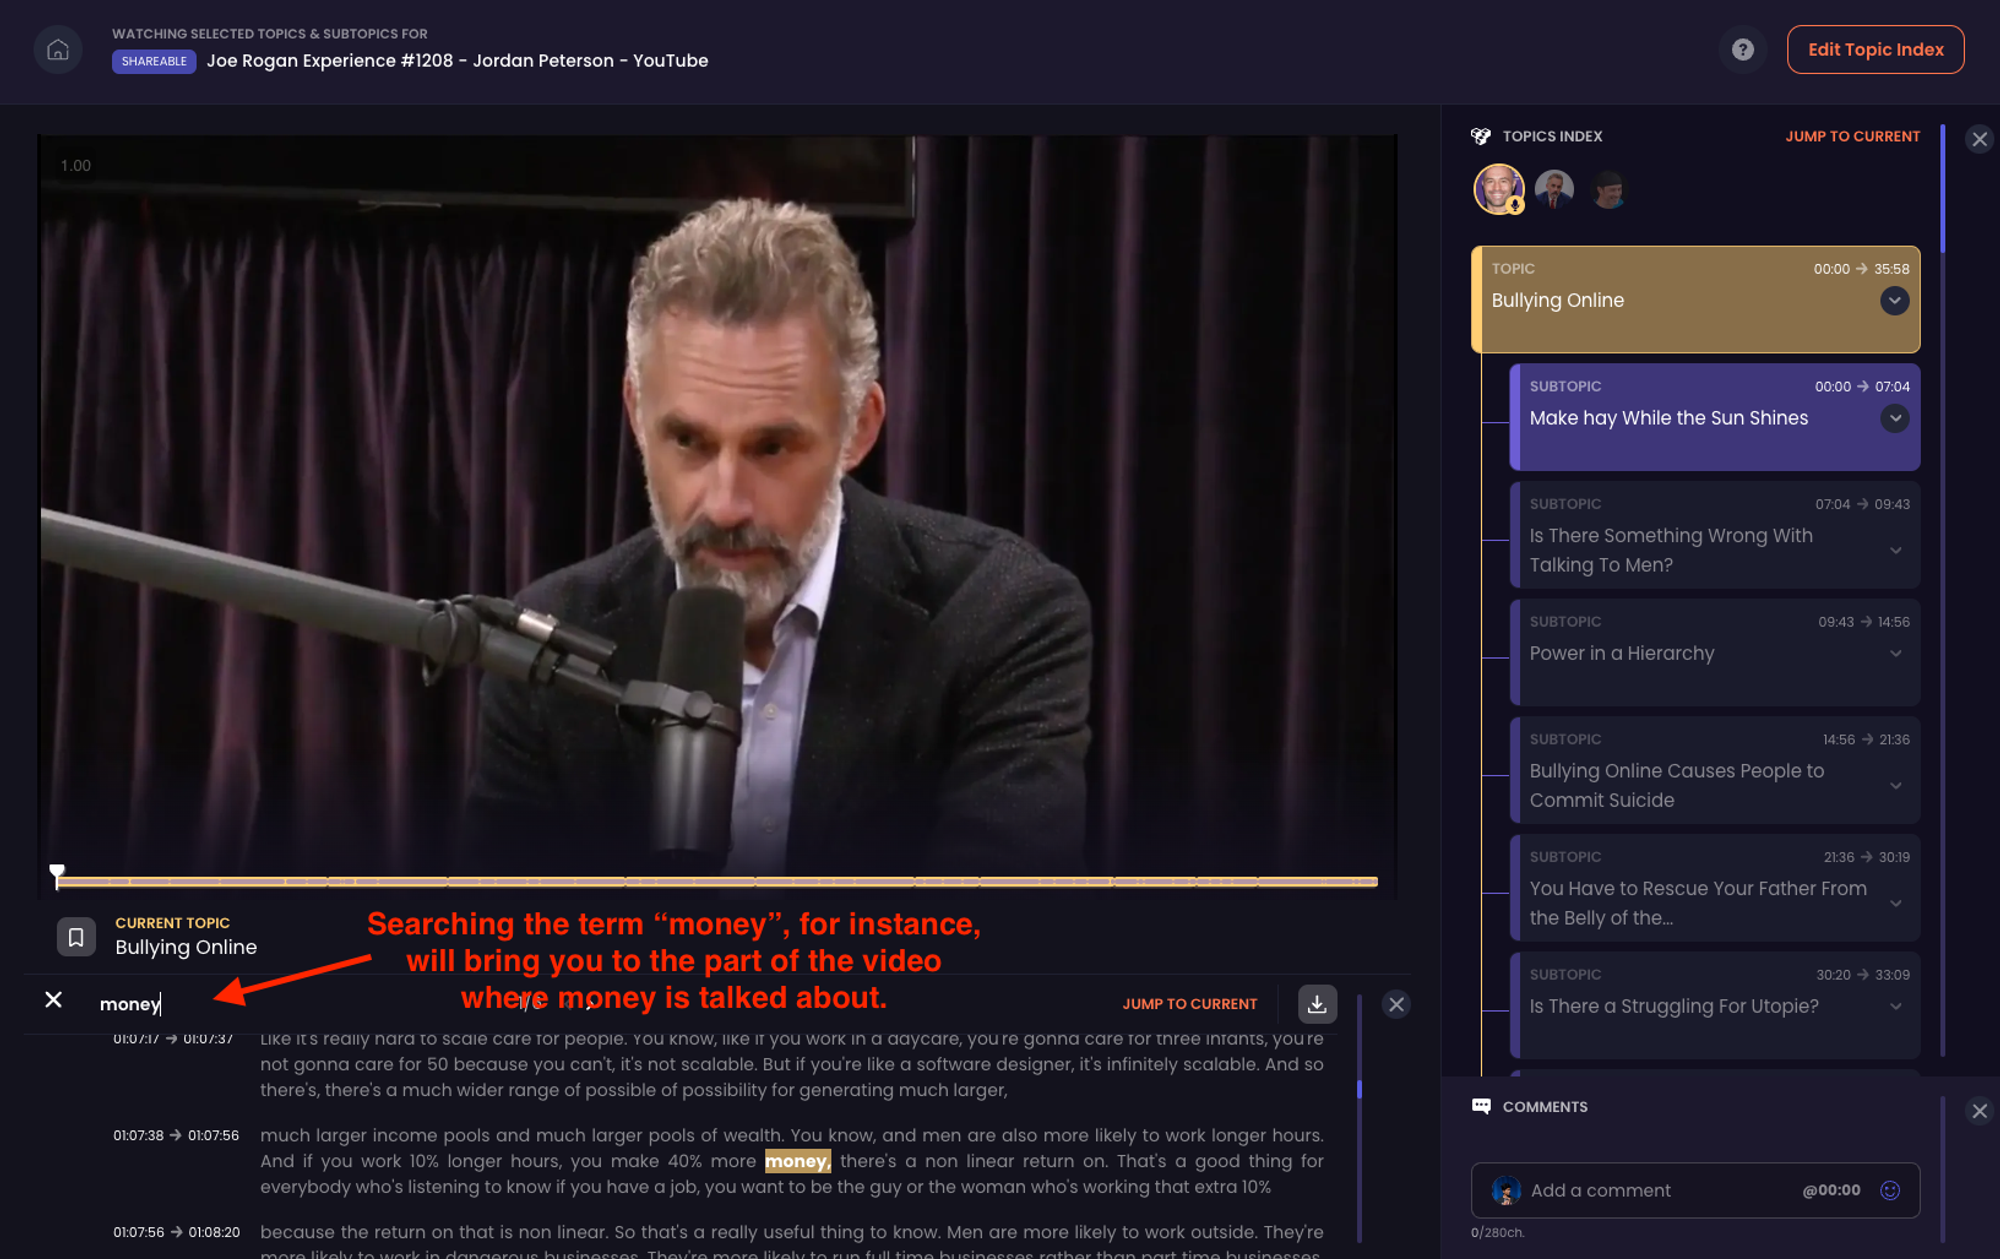
P.S., after recording a podcast, you may want to consider CLIPr — a video analysis and management (VAM) platform. Its AI-driven video indexing makes navigating episodes a breeze. With features like sound control, closed captions, and interactive reaction controls, CLIPr not only makes your podcast more accessible but also more engaging.
{{cta}}
Benefits of Recording a Podcast on an iPhone
Recording a podcast on an iPhone offers several benefits, making it an accessible and efficient choice for podcasters of all levels.
Here are the key advantages:
- Portability: iPhones are incredibly portable, allowing you to record podcasts from virtually anywhere. This flexibility is perfect for on-the-go interviews or spontaneous recording sessions.
- Ease of Use: The intuitive interface of iPhones makes them extremely user-friendly for podcasters. With minimal setup and a straightforward recording process, even beginners can start recording quickly.
- Immediate Sharing & Uploading: iPhones enable instant sharing and uploading of your podcast. Whether it's uploading to a hosting platform or sharing snippets on social media, the process is quick and seamless.
- Quality Recording: Modern iPhones are equipped with high-quality microphones that can produce surprisingly good podcast audio. While external mics can enhance the quality further, the built-in microphone is ideal for starters.

Source: Freepik
Essential Podcast Equipment for Recording a Podcast on an iPhone
Recording a podcast on an iPhone is a convenient and cost-effective way to produce quality content. Even though your iPhone is a powerful tool in itself, having the right equipment can significantly enhance the quality of your podcast. Here's a breakdown of the essential equipment you'll need:
- External Microphone: The built-in microphone on your iPhone is decent for casual use, but for podcasting, an external microphone is essential for clear, crisp audio recordings. There are various mics available that can directly connect to your iPhone, either via the lightning port or wirelessly.
- Pop Filter: A pop filter is a simple screen that sits between your microphone and your mouth. It reduces or eliminates popping sounds caused by the fast-moving air of hard consonants like 'P' and 'B'.
- Headphones: A good pair of headphones is necessary for monitoring your audio recording in real-time. Wearing headphones helps you catch any issues with the recording as they happen.
- Microphone Stand or Holder: A stand or holder will keep your microphone stable and at the right height and angle, freeing your hands and reducing handling noise.
- Windscreen or Foam Cover: If you plan to record outdoors or in a breezy environment, a windscreen or foam cover for your microphone will help reduce wind noise.
7 Factors to Consider When Choosing the Right Podcast Recording App
When embarking on the journey of recording a podcast using your iPhone, selecting the right recording app is crucial. You might be tempted to use the Voice Memos app, but multiple findings suggest that the podcast recording app can significantly impact the quality and efficiency of your podcast production.
Here are key factors to consider when choosing the perfect podcast recording app for your iPhone:
- Audio Quality: The primary concern should be the audio quality that the app can deliver. Look for apps that offer high-resolution audio recording capabilities. The higher the quality of the recording, the more professional your podcast will sound.
- Ease of Use: The user interface and overall usability of the app are crucial, especially if you are a beginner. An app with an intuitive design will make the recording process smoother and more enjoyable.
- Editing Features: Post-recording editing is an essential part of podcasting. Choose an app that includes basic editing tools like trimming, cutting, and adding sound effects or music. Advanced features such as noise reduction and equalization can be a bonus.
- Multitrack Recording: If you plan to record interviews or have multiple hosts, consider an app that supports multitrack recording. This feature allows you to record each speaker on a separate track, making post-production editing easier.
- Integration with External Devices: If you use external microphones or other audio equipment, ensure the app supports external hardware. Good integration with external devices can significantly enhance the audio quality.
- File Export & Sharing Options: The app should offer a straightforward way to export and share your recordings. Compatibility with different file formats and easy sharing options to various platforms (like social media or podcast hosting services) are important for distributing your podcast.
- Cost & Subscription Model: Finally, consider the cost. Some apps are free with basic features, while others require a subscription or a one-time purchase. Evaluate whether the features offered justify the price and fit within your budget.
- Pro Tip: After recording, you can use CLIPr to highlight and share key moments of your podcast. Moreover, you can leverage its nuanced reaction controls and comment features to boost audience interaction.
{{cta}}
Top 2 Podcast Recording Apps Available in the Market
Uncertain about which app to choose for podcast recording? Well, don’t worry - we’ve figured out some best options available in the market.
Let’s explore some best podcast recording apps:
1. Riverside.fm

Riverside.fm is a standout choice for podcasters seeking professional-grade recording capabilities directly from their iPhone. With its unique feature of recording each participant's audio locally, this app ensures that the final audio files' quality is not compromised by unstable internet connections.
Additionally, its progressive upload functionality significantly streamlines post-production processes. The best part? The app's intuitive interface makes it simple for podcast guests to join the recording session via an invite link, reinforcing its user-friendly approach.
Key Features:
- High-definition audio and video recording capabilities.
- Records audio and video tracks locally on each participant's device.
- Internet-based backup recording for additional security.
- Supports live streaming and audience participation through call-ins.
- AI-powered service supporting over 100 languages.
- Customizable options for a tailored recording experience.
- Provides valuable data for optimizing content.
- Feature for overseeing technical aspects of the recording.
- Best For:
- People who record podcasts with remote guests
- Podcasters needing high-quality audio and video
Where to Install: App Store
Pro Tip: If Riverside hits all the marks but it's still not completely doing it for you, we got you covered! Check out our full breakdown of the top Riverside alternatives and find the best option for you.
2. Spotify for Podcasters

Spotify for Podcasters offers a comprehensive podcasting solution that integrates recording, editing, publishing, and monetization tools. This app is particularly appealing to beginners and those seeking a streamlined podcasting experience. It also supports recording with up to four remote guests, making it suitable for collaborative and interview-style podcasts.
Plus, its unlimited free hosting service makes it accessible for podcasters on a budget. Whether you’re starting your first podcast or looking for a hassle-free recording solution, this app offers a valuable set of features to bring your podcasting ideas to life.
Key Features:
- Detailed analytics including listens, streams, and follower numbers.
- Record, publish, and monetize podcasts from one place
- Provides demographic data of listeners like age, gender etc.
- Offers ways to generate revenue through subscriptions and donations.
- Provides helpful resources and guides for newcomers
- Offers free podcast hosting service
Best For:
- New podcasters seeking an all-in-one platform
- Those wanting unlimited podcast hosting for free
Where to Install: App Store
How to Record a Podcast on an iPhone? A 7-Step Guide
Here’s a simple 7-step guide to help iOS users record a podcast:
1. Set Up Your iPhone
Before you start recording, it's crucial to properly set up your iPhone. This ensures the best quality audio for your podcast. Here's what to do:
- Optimal Settings: Adjust your iPhone's settings for optimal recording quality. Disable any unnecessary sounds or alerts that might interrupt the recording.
- Battery & Storage: Ensure your iPhone has enough battery life and storage space for the recording session.
- Microphone Check: Test your iPhone’s built-in microphone or connect an external microphone for better sound quality.
- Do Not Disturb Mode: Activate this mode to prevent calls and notifications from disrupting the recording.
Pro Tip: Use a stable surface to mount your iPhone. This reduces handling noise and keeps your recording steady.
2. Select an Optimal Environment for Recording
The recording environment significantly impacts the audio quality of your podcast. Here's how to select an ideal space:
- Quiet Surroundings: Choose a quiet room with minimal background noise. Avoid areas with street noise, loud appliances, or echoing.
- Sound Absorption: Use soft materials like curtains, carpets, or cushions to dampen echoes and absorb sound.
- Consistent Environment: Record in the same space each time to maintain consistent audio quality across episodes.
- Avoid Interruptions: Inform others around you to prevent accidental disturbances during your recording session.
Pro Tip: If you're struggling with echo, recording in a closet full of clothes can surprisingly provide studio-quality sound dampening.
3. Install the Chosen Podcast Recording App
Once your iPhone and environment are set, it’s time to install the chosen podcast recording app. Here's what to consider in this phase:
- Permissions: Ensure the app has the necessary permissions to access your iPhone's microphone and storage.
- Explore Features: Familiarize yourself with the app's features - recording controls, editing tools, and export options.
- Create a Test Recording: Before you start recording your actual podcast, create a test recording to ensure everything is working correctly.
- Practice Recording: Practice recording short segments or sample content to get comfortable with the app's recording process.
Pro Tip: Regularly back up your podcast recordings to a cloud storage service or external drive to prevent data loss.
4. Record & Edit Podcast Audio
After installing the app, you will need to start recording and editing your podcast. Here's how to get started:
- Prepare Your Content: Have a clear outline or script ready before recording. This ensures a structured and engaging podcast. Also, make sure that you end your podcast with a killer outro to keep your listeners coming back for more.
- Record in Segments: Break your podcast into segments or sections for easier editing later.
- Edit Your Podcast: After recording, use the editing features in your chosen app to trim, cut, and enhance the audio. Remove any mistakes or unwanted noise.
- Listen & Review: Always listen to the entire podcast to catch any errors or areas that need improvement.
Pro Tip: Keep an eye on your audio levels during recording to ensure they don't peak or clip, which can result in distorted audio. Most recording apps have level meters for this purpose.
Source: Freepik
5. Enhance Podcast Recording
To make your podcast stand out, consider enhancing the quality of your recording. To do so, follow these tips:
- Control Room Acoustics: Improve room acoustics by adding bass traps and diffusers. This can significantly enhance the sound quality of your recordings.
- Background Noise Reduction: Use noise reduction tools or plugins to eliminate any remaining background noise in your recording.
- Experiment with Microphone Placement: Adjust the distance and angle of your microphone to find the sweet spot for capturing your voice.
- Practice Vocal Techniques: Work on your vocal techniques to ensure clear and articulate speech.
Pro Tip: Experiment with different microphone positions and settings to find the optimal configuration for your voice and recording environment.
6. Add Music and Effects
Adding music and sound effects can enhance the production value of your podcast. Here's how to incorporate them effectively:
- Royalty-Free Music: Use royalty-free music or obtain proper licenses for any copyrighted music tracks (background music) you want to include in your podcast.
- Sound Effects: Consider using sound effects to emphasize key points or create a specific atmosphere in your podcast.
- Editing Software: Use your chosen podcast recording app or dedicated audio editing software to seamlessly integrate music and sound effects.
- Volume Control: Ensure that the music and effects are balanced with your voice. They should enhance, not overpower, your content.
Pro Tip: Explore online libraries and resources for royalty-free music and sound effects to avoid copyright issues while adding depth to your podcast.
7. Export & Publish the Podcast
After you've recorded, edited, and enhanced your podcast, it's time to share it with the world. Here's how to export and publish your podcast:
- Export the Audio: In your podcast recording app, locate the option to export the audio file. Choose a high-quality format such as MP3 or WAV.
- Metadata & Tags: Fill in essential metadata, including the podcast title, episode title, episode description, and cover art. Add relevant tags to improve discoverability.
- Hosting Platform: Select a podcast hosting service where you'll store your podcast episodes. Popular options include Libsyn, Podbean, and Anchor.
- Submit to Podcast Directories: Submit your podcast to popular directories like Apple Podcast, Spotify, Google Podcasts, and others. Each platform may have its submission process.
Pro Tip: Consistency is key. Stick to a regular release schedule for your episodes to build and retain your audience on directories like Apple podcasts.
Elevate Your Podcasting Experience with CLIPr
To wrap it all up, recording a podcast on an iPhone is a straightforward process that offers convenience and accessibility to aspiring podcasters. By following the seven steps outlined in the guide, you can create high-quality podcast content using their iPhones.
Key Takeaways:
- Choose a quiet location for recording.
- Use high-quality headphones and a microphone.
- Utilize podcasting apps like riverside.fm or Spotify for Podcasters
- Edit and enhance your audio for a polished result.
Once your podcast is recorded, CLIPr can be a game-changer. Its helps segment episodes into topics, making it easier for listeners to navigate and engage with your content. Plus, it’s sharing features are particularly beneficial for remote teams, allowing for easy distribution and collaboration. So, why not give CLIPr a try?
{{cta}}
Frequently Asked Questions - (FAQs)
Can I Record a Podcast with Multiple Hosts or Guests on my iPhone?
Yes, you can record video podcasts with multiple hosts or guests on your iPhone. Use a podcasting app that supports multiple audio inputs, connect external microphones, and ensure a quiet environment for clear video recording.
What Are Some Common Mistakes to Avoid When Recording a Podcast on iPhone?
While recording podcasts, avoid background noise, use a good-quality external microphone, maintain consistent audio levels, and record in a quiet space. Additionally, be mindful of interruptions, such as notifications, and ensure all hosts or guests have stable internet connections.
What is the Recommended Length for a Podcast Episode Recorded on an iPhone?
Ideally, aim to record audio for around 20 to 60 minutes. This allows you to cover your topic effectively without overwhelming your audience. However, the length of the video podcast varies depending on your content and target audience, so focus on delivering value over duration.
Read Next
CLIPr Your Next Viral Moment in Minutes
Tame video chaos with CLIPr: Navigate through AI-driven chapters, dive into searchable transcripts, and highlight pivotal moments for easy collaboration and content repurposing